Last fall, I got stranded on a day hike after my pack slid down a ravine, taking my lighter, headlamp, and all my pre-packed emergency gear with it. The sun was setting fast, and temperatures were set to drop below freezing, so I knew I had to figure out how to start fire with no lighter fast if I wanted to stay safe through the night. Most casual campers and hikers never think they’ll need to know how to start fire with no lighter, but gear gets lost, lighters get wet, and unexpected situations pop up all the time. I fumbled through a couple of methods I’d seen online before I found one that worked, and that experience taught me just how critical it is to have these skills memorized, not just saved to a phone playlist. Even if you never get lost on a hike, these skills come in handy for camping trips, power outages, and any other unexpected situation where you need heat, light, or a way to boil water.
Key Pre-Requisites to Start Fire with No Lighter Successfully
Before you test any way to start fire with no lighter, you first need to gather all three components of the fire triangle: heat, fuel, and oxygen. Tinder is the most critical piece of the puzzle, because it’s the only material that will catch from a small spark or low-heat ember. If your tinder isn’t fine enough or dry enough, even the most perfectly executed friction method won’t give you a flame.
Natural tinder sources you can forage almost anywhere include fluffy cattail cotton, papery dry birch bark, sticky pine resin, crumbly dried grass, and even the lint from your jacket pockets if you have it. Tinder prep tips to remember: shred the material as fine as possible, and form it into a loose bird’s nest shape so air can flow through it easily. You also want to have your kindling (pencil-thick dry sticks) and larger fuel wood stacked and ready before you start generating heat, so you don’t lose your ember while you scramble for more materials.
Top 3 Beginner-Friendly Fire Starting Methods That Require No Special Gear
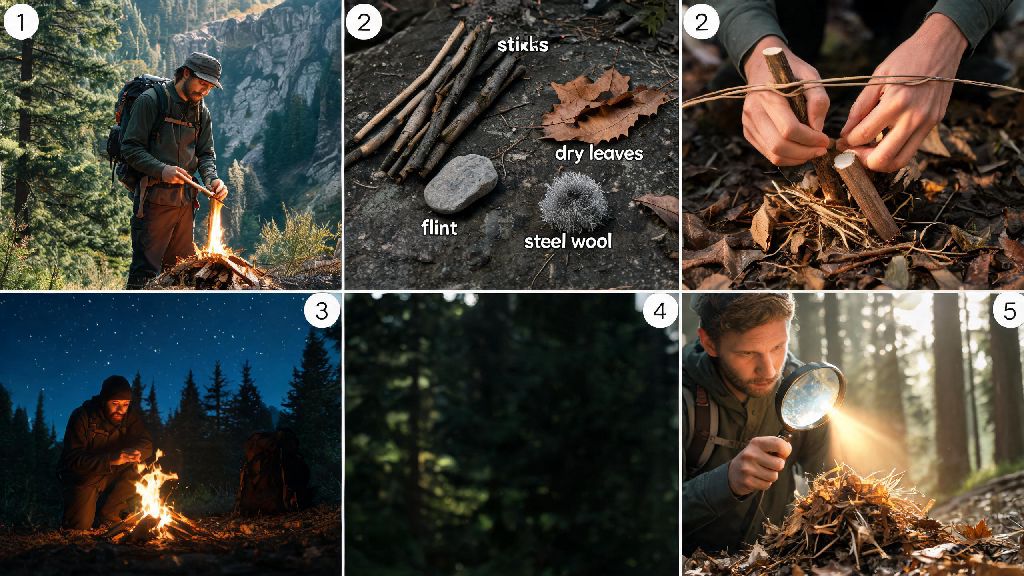
You don’t need a fancy survival kit to pull these off, just items you can find outside or likely have on you already. I recommend practicing all three in your backyard first, so you know which one feels most natural for you to use under stress:
I always recommend starting with the magnifying glass method if you’re new, because it’s low effort and almost impossible to mess up on a sunny day. The bow drill takes a bit more practice, but it works even in overcast, cold conditions where lens methods won’t. But if you’re trying to use the bow drill in damp conditions, you can coat the end of the spindle with a small amount of pine resin to reduce moisture and help the ember form faster. I keep a small chunk of pine resin in my hiking boot laces just for this purpose, since it’s lightweight and takes up almost no space.
Less Common (But Extremely Useful) Fire Starting Hacks for Emergency Situations
These hacks work when you don’t have the materials for the more common ways to start fire with no lighter, and they take far less time than friction methods in most cases. The first one I always keep in mind is the battery and steel wool method: if you have a AA, AAA, or 9V battery and a piece of steel wool (even a steel scouring pad from a kitchen works), touch the ends of the battery to the steel wool. The current will heat the steel wool until it glows red hot, and you can transfer that glow to your tinder nest immediately.
I had to use this method during a winter power outage last year, and it took less than 10 seconds to get a glowing ember, even in 20-degree weather. Just make sure you don’t hold the steel wool for too long, because it gets very hot very fast and can burn your fingers. But if you don’t have steel wool, you can also use the foil from a gum wrapper or a candy bar. Fold the foil into a narrow strip, touch the ends to the battery terminals, and the middle of the strip will heat up and ignite. I’ve tested this trick with a AA battery and a gum wrapper, and it works just as well as steel wool if you fold the foil correctly.
The other useful hack is the fire plow method, which works if you don’t have the materials to build a bow drill. You cut a small ¼-inch groove in a flat piece of soft wood, then rub the tip of a hard stick back and forth along the groove quickly. The friction creates small embers that fall onto your tinder placed at the end of the groove. This method takes more upper body strength than the bow drill, but it’s far simpler to set up when you’re in a rush.
Common Mistakes That Will Stop Your Fire From Catching (And How to Fix Them)
Most of these mistakes happen because people rush the prep process when they’re trying to start fire with no lighter, instead of taking an extra minute to get their materials ready. The biggest mistake I see new people make is not prepping their tinder, kindling, and fuel wood first. If you spend 10 minutes creating an ember, but you don’t have small sticks ready to place on top of the burning tinder, your flame will die out in seconds. Always stack your kindling in a teepee shape around your tinder nest before you start creating heat, so you can add fuel immediately once you have a flame.
Another common mistake is using wet or green wood. Even the best fire starting method won’t work if your tinder is damp, or your kindling is full of moisture. If you’re in a wet area, peel off the outer bark of sticks to get to the dry inner wood, or look for dead branches under dense tree canopies that didn’t get rained on. You can also rub damp tinder between your hands for a minute to dry it out before you try to light it.
The third mistake is blowing too hard on your ember. When your tinder starts smoldering, you want to blow gently, starting from a few inches away, to feed it oxygen without blowing the ember out of the nest. I’ve seen so many people get excited when they see smoke, blow as hard as they can, and end up scattering their tinder everywhere. So if you’re in a snowy area, you can also dig a small hole for your fire to block wind, which will make it much easier to keep your flame alive once it catches. Wind is one of the biggest hidden barriers to getting a fire going, especially when you’re working with a small ember that can blow out easily.
You don’t have to be a seasoned survival expert to master these skills, even if you’re only practicing for casual camping trips. I recommend picking one method to try first in your backyard, before you ever need it in an emergency, so you can work out the kinks without stress. Once you get the hang of even one of these techniques, you’ll feel much more confident heading out on hikes or dealing with unexpected power outages. Learning how to start fire with no lighter is one of the most practical, low-effort survival skills you can add to your toolkit, and it might just keep you safe if you ever find yourself in a tight spot.