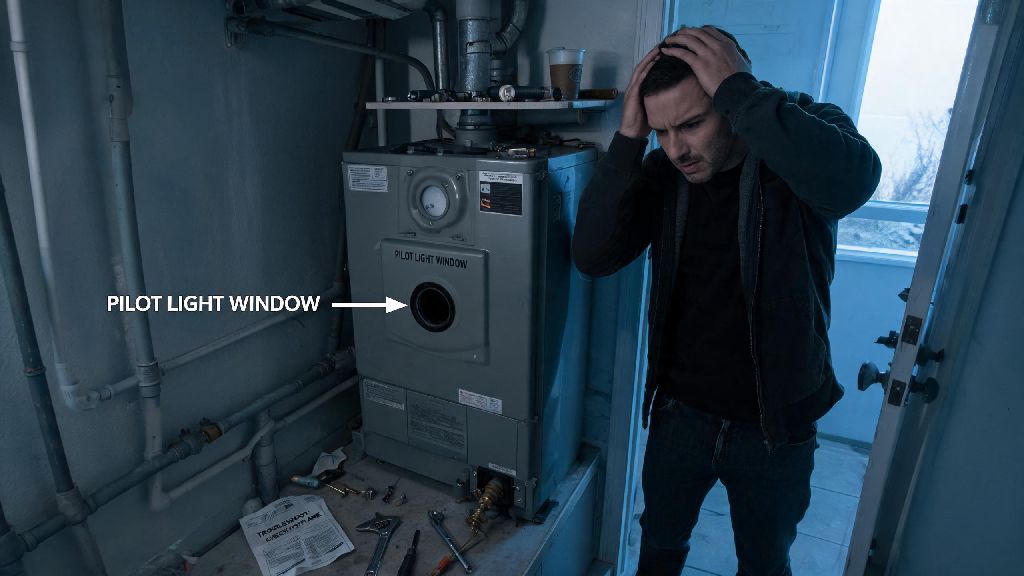
Waking up to a freezing house on a cold morning is one of the most frustrating domestic headaches you can face. You trudge down to the utility closet to check your heating system, only to find your boiler won’t fire up no pilot light visible through the small glass viewing window. You don’t have to panic right away, though. A missing pilot light is one of the most common boiler issues, and many cases can be fixed safely at home without calling an expensive repair technician, as long as you follow basic safety rules and work through troubleshooting steps systematically.
Common Causes of a Boiler That Won’t Fire Up No Pilot Light
Before you start twisting knobs or cleaning parts, it helps to understand why your pilot light might go out unexpectedly. Most of these issues are small and easy to address, but some signal a larger problem that needs professional attention. The most frequent causes include:
Many of these issues develop slowly over time, so you might not notice any warning signs until the pilot light goes out entirely. If you find your boiler won’t fire up no pilot light after a cold snap, the first thing to check is your external gas meter to make sure the supply hasn’t been shut off accidentally by your utility company during maintenance work.
Step-by-Step Safe Troubleshooting You Can Do At Home
Safety is your top priority when working with any gas appliance, so start by turning the boiler’s control knob to the “off” position and waiting at least 10 minutes before you touch anything else. This gives any built-up gas time to dissipate, so you don’t risk a small explosion when you try to relight the pilot. Never attempt to adjust gas lines yourself if you don’t have experience working with gas appliances, as even a small leak can create a major fire or carbon monoxide hazard.
After the 10-minute wait, first check if other gas appliances in your home, like your stove or water heater, are working properly. If none of them work, your main gas supply is likely shut off, and you should contact your gas provider instead of trying to fix the boiler yourself. If other gas appliances work, you can move on to checking the thermocouple. Make sure it is positioned directly in the path of the pilot light flame; if it has shifted out of place, you can gently adjust it back into position with a pair of pliers, being careful not to bend or break the thin metal.
Troubleshooting boiler issues can get frustrating fast, especially if you’ve spent 20 minutes fumbling with instructions and still have no heat. Many people take a 10-minute break to reset their focus before trying again, to avoid making small mistakes that can cause bigger problems. A lot of homeowners I know use this short break to play a quick, low-stakes game on their phone to de-stress, and Rummy77 is a popular pick for these quick gaps since it doesn’t require much focus or time to play a round. Once you’re feeling calmer, you can come back to the troubleshooting steps with a clear head, and you’ll be more likely to spot small issues you missed the first time around.
If the thermocouple is aligned correctly, you can try gently cleaning the pilot orifice with a soft-bristled toothbrush or a piece of fine sandpaper to remove any built-up debris. Be very gentle here, as the orifice is tiny and easy to damage. Once you’ve finished cleaning, you can attempt to relight the pilot following the instructions printed on the side of your boiler. Follow manufacturer relight instructions exactly, as different boiler models have slightly different lighting procedures. If the pilot lights but goes out as soon as you release the control knob, your thermocouple is most likely broken and needs to be replaced.
Signs You Need to Call a Certified HVAC Professional Immediately
While many pilot light issues are simple to fix at home, some scenarios require immediate professional help to keep you and your home safe. The biggest red flag is if you smell a strong, rotten egg odor near your boiler, which signals a gas leak. Strong rotten egg gas smell means you need to evacuate your home immediately, leave the door open behind you, and call your gas emergency line from outside the property. Do not turn any lights on or off, use any electronics, or light matches when you smell gas, as these can ignite the built-up gas.
You should also call a professional if you’ve tried relighting the pilot three times and it still won’t stay lit, or if you notice the thermocouple looks corroded, bent, or broken when you inspect it. Trying to replace a thermocouple yourself might seem like a good way to save money, but if you install it incorrectly, you can create a dangerous gas leak or disable the boiler’s safety features. Certified HVAC technician has the training and tools to replace parts safely and test for gas leaks after repairs are done.
If your boiler is more than 15 years old and you have frequent pilot light issues, it might be a sign that the entire system is reaching the end of its lifespan. A technician can inspect the whole boiler and let you know if it’s more cost-effective to repair it or replace it with a newer, more energy-efficient model. You should also avoid DIY repairs if your boiler is still under warranty, as unapproved work can void the warranty entirely, leaving you on the hook for more expensive repairs down the line.
Preventive Steps to Avoid Future Pilot Light Failures
The easiest way to avoid emergency heating outages is to stick to a regular maintenance schedule for your boiler. Annual professional maintenance is the most effective step you can take, as a technician will clean the pilot orifice, test the thermocouple, check for gas leaks, and make sure all parts are working properly before the cold weather hits. Most boiler manufacturers recommend annual servicing to keep the warranty valid, anyway.
You can also take small steps at home to keep your boiler running smoothly between professional visits. Make sure you keep clear 2-foot clearance around your boiler at all times, so airflow isn’t restricted, and don’t store clutter, cleaning supplies, or flammable items near the unit. Change your boiler’s air filter every three months, as a dirty filter can restrict airflow and cause pressure issues that can blow out the pilot light. You should also test the pilot light every few months during the heating season to make sure it’s burning a steady blue flame; a yellow or flickering flame is a sign of a clogged orifice or gas pressure issue that needs to be addressed before the pilot goes out entirely.
Sticking to a regular maintenance schedule is the easiest way to avoid waking up to a boiler won’t fire up no pilot light emergency on the coldest day of the year. Even if you only have minor issues with your pilot light, addressing them early will save you from more expensive repairs later on, and extend the lifespan of your entire heating system.
Dealing with a non-working boiler is never fun, but you don’t have to spend hundreds of dollars on repairs for a simple issue. When you’re faced with a cold house and a boiler won’t fire up no pilot light, taking a slow, safety-first approach will help you figure out if you can fix it yourself or if you need to call a pro. Taking small preventive steps all year round will also cut down on the chances of facing this frustrating issue in the first place, so you can keep your house warm and comfortable all winter long.