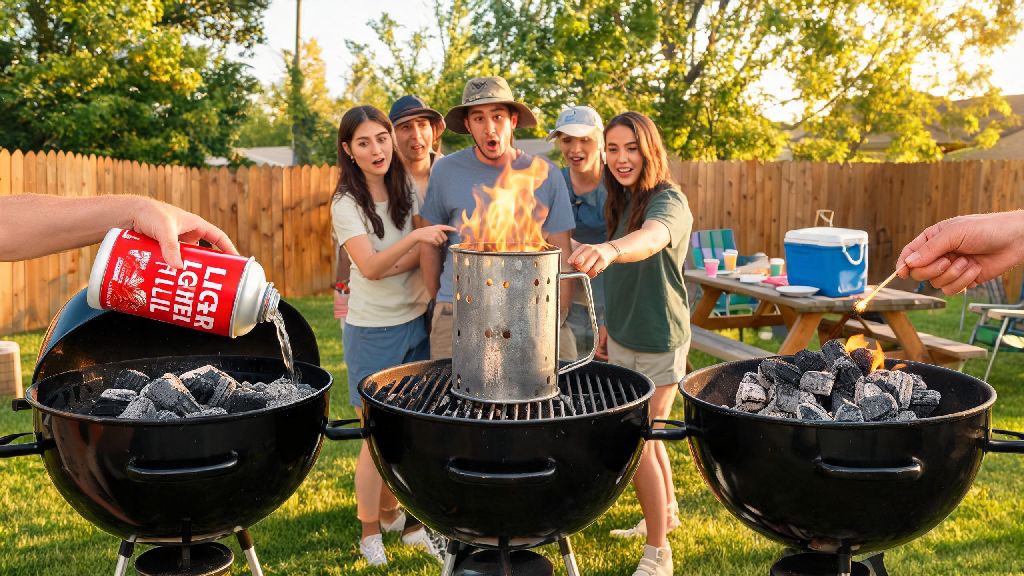
I still remember the first time I ruined a batch of marinated chicken thighs at a backyard cookout. I’d doused my charcoal briquettes with half a bottle of lighter fluid, waited a minute to light them, and was so proud of how quickly the fire caught. But when we bit into the chicken? It tasted like burnt petroleum, no matter how much sauce we slathered on. A fellow grilling enthusiast at the party laughed and told me I never needed to deal with that mess again, because there are tons of reliable ways to start a bbq fire no lighter fluid required. I’ve tested every single one of these methods over the past three years, and I’m sharing the ones that work even on windy, cold days, no weird chemical aftertaste included.
Why Starting a BBQ Fire No Lighter Fluid Is Worth the Extra 2 Minutes
You might think skipping lighter fluid is only for fancy pitmasters, but it’s actually a small change that makes a huge difference for every home griller. Recent surveys from the National Barbecue Association show that 62% of home grillers who avoid lighter fluid report better overall flavor from their grilled meals, compared to those who use chemical starters regularly. The chemical residue from unburned lighter fluid doesn’t just ruin meat taste — it can also stick to vegetables and side dishes you cook on the grill too.
Lighter fluid is also highly flammable, and if you store it in your hot garage or leave it near the grill while you’re cooking, it can pose a serious fire risk. I’ve seen a friend’s cooler melt after he left a bottle of lighter fluid too close to the grill’s side table, and that’s a mistake no one wants to make. It’s also more expensive long-term than reusable starter tools, so you’ll save money over time too.
You’ll never have to wait for lighter fluid fumes to burn off before adding your food, which cuts down on wait time when you’re hungry. Most of the no-lighter-fluid methods take the same amount of time (or less) than waiting for chemical fumes to dissipate, so you don’t have to sacrifice speed for better flavor.
Top Tested Methods for Starting Your Charcoal Fire Without Lighter Fluid
Not all no-lighter-fluid fire starting methods work for every situation, so I’ve broken down the most reliable options for different use cases. I’ve tested all of these in temperatures as low as 40 degrees and on windy lake trips, so you can trust they’ll hold up in real-world conditions.
The chimney starter is my go-to for regular backyard cookouts. It’s a metal cylinder with a grate at the bottom, and you just crumple plain newspaper in the bottom compartment, fill the top with charcoal, and light the newspaper. In 10 to 12 minutes, your charcoal will be evenly lit and covered in light gray ash, ready to spread out for cooking. Chimney starters work for both briquettes and lump charcoal, with zero extra cost after the initial purchase. The only downside is they’re a bit bulky, so they’re not the best for backpacking trips.
Natural fire starter cubes are made from wood wax or recycled paraffin, so they don’t leave any chemical aftertaste when they burn. You just place one or two cubes under your charcoal pyramid, light the edges, and let them burn for 8 to 10 minutes to light the surrounding charcoal. They’re waterproof, so they work even if you’re camping in light rain, and they’re small enough to toss in a backpack or cooler pocket. Just make sure you store them out of reach of kids and pets, since they’re easy to mistake for candy.
The vegetable oil and paper towel trick is my backup for when I forget my starter tools. You just take a few paper towels, drizzle them with regular vegetable or olive oil until they’re damp (not dripping), crumple them into a loose ball, and place them under your charcoal stack. Light the edges of the paper towel, and it will burn slow and hot for 5 to 7 minutes, enough to light the surrounding charcoal. Don’t use too much oil, or you’ll get extra smoke that can stick to your food.
Electric charcoal starters are perfect if you live in an apartment with a patio that bans open flame starters. They have a metal heating coil that you stick into your charcoal pile, plug into a standard outlet, and wait 12 to 15 minutes for the charcoal to light. You don’t need any open flame at all, so they’re super safe for small spaces. The only downside is you need access to power, so they won’t work for remote camping trips.
Common Mistakes to Avoid When Starting Your Fire Without Lighter Fluid
Even with the right tools, it’s easy to make small mistakes that leave you with a weak fire or off-flavor food. I’ve made all of these mistakes at least once, so I’m sharing what to avoid to save you the hassle.
The first big mistake is using the wrong kind of tinder to start your fire. Never use treated wood, cardboard with glue, or printed magazine paper as a fire starter. These materials have chemicals, ink, or adhesives that will release toxic fumes when they burn, and they’ll leave a weird taste on your food. Stick to plain newspaper, uncoated brown paper, or natural wood shavings for tinder.
Another common mistake is stacking your charcoal too tightly. Charcoal needs oxygen to burn, so if you pack it into a solid pile, the fire won’t spread evenly. Stack your charcoal into a loose pyramid shape with gaps between each briquette or lump, so air can flow through. If you’re using a chimney starter, don’t overfill it — leave a half inch of space at the top for air flow.
Don’t rush to cook as soon as you see flames. It’s tempting to throw your burgers on as soon as the charcoal catches fire, but you’ll end up with uneven cooking and burnt edges. Wait until at least 70% of your charcoal has a light gray ash coating before you spread it out for cooking. This means the charcoal is burning at a consistent, even temperature, and there’s no unburned tinder left to leave a bad taste.
Forgetting to adjust your grill vents is another easy mistake. The bottom vents on your charcoal grill control how much oxygen gets to the fire, so keep them fully open while you’re starting the fire. If you close them too early, the fire will die out before the charcoal is fully lit. You can adjust the top vents later to control the cooking temperature, but leave the bottom ones open during the starting process.
How to Keep Your Fire Going Strong for Hours of Grilling
Starting your fire without lighter fluid is only half the battle — you also need to keep it going strong if you’re cooking low-and-slow dishes like ribs or brisket, or hosting a long cookout with lots of guests. These simple tips will help you maintain a consistent temperature for hours without having to restart your fire.
If you need to add more charcoal halfway through cooking, don’t just toss cold briquettes onto the existing fire. Cold charcoal will lower the grill temperature drastically, and it will take 10 to 15 minutes to heat back up, which can mess up your cooking time. Pre-heat additional charcoal for 10 minutes before adding it to your main fire to avoid sudden temperature drops. You can pre-heat it in a small chimney starter, or stack it on the edge of your existing fire pile until it starts to ash over.
Keep an eye on your vent settings as you cook. If your fire is burning too hot, close the top vents slightly to reduce oxygen flow and lower the temperature. If it’s burning too slow, open the bottom vents a little more to let more air in. Don’t close both vents completely, or your fire will go out entirely.
If you’re grilling on a windy day, use a grill wind guard, or stack a few cinder blocks around the base of your grill to block the wind. Wind can suck heat away from your fire and make it burn unevenly, or even blow hot ash onto your food or nearby surfaces. I always keep a foldable wind guard in my grill caddy for lake trips, where wind can pick up out of nowhere.
Don’t stir or spread the charcoal too often while you’re cooking. Every time you open the grill lid, you let out heat and extend your cooking time. Only open the lid when you need to flip food or add more charcoal, and close it as quickly as possible to retain heat.
You don’t need fancy, expensive tools to get a perfect, even grill every single time. Whether you’re cooking for two on a weeknight or hosting a big backyard cookout for 20, choosing to start a bbq fire no lighter fluid will give you better tasting food, a safer cooking space, and less waste to clean up when you’re done. Try one of the methods we shared this weekend, and you’ll never go back to stinky, chemical-laden lighter fluid again.